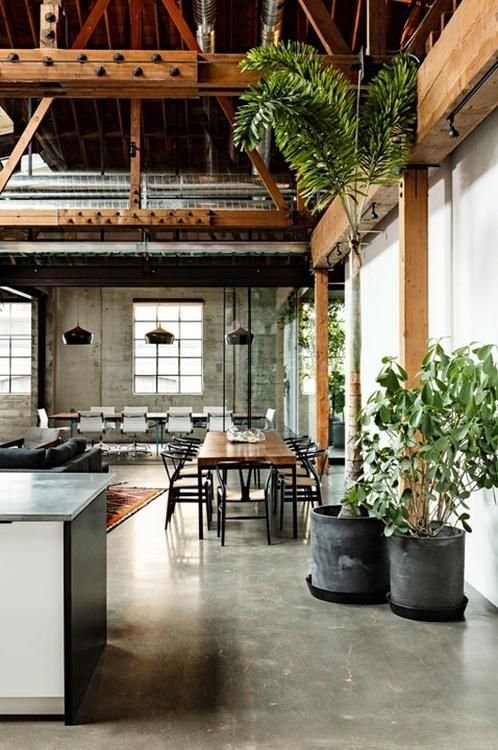
Decorative Concrete Flooring
Concrete Polishing
Concrete polishing is the new standard concrete flooring option. Concrete is a natural composite material made from an aggregate (typically rocks, river stones, and granite chips) combined with a cement binder (such as limestone and calcium sulphate) and water. For those wondering what the difference is between concrete and cement, the simple answer is that cement is a component of concrete: Sidewalks are made of concrete, not cement. Transforming concrete into a smooth and decorative surface for flooring requires treating it with a concrete densifier, a chemical that's applied over the concrete surface to fill the pores. Once the surface is prepared and dried, it's then ground with grinding tools that get progressively finer to achieve the desired finish. Polished concrete is measured in grades and finishes: the higher the grade, the larger the exposed aggregates; similarly, the higher the finish, the shinier the polish. Citation: http://www.remodelista.com/posts/remodeling-101-polished-concrete-floorsPolished Concrete Versus Other Flooring Materials
| Different Types | Polished Concrete | Wood or Wood Laminate | Wall-to-Wall Carpet | Ceramic Tile | Vinyl or Linoleum | Natural Stone (such as slate or marble) |
| Available in a wide spectrum of design options | Unlimited | Yes | Yes | Yes | Yes | No |
| Longevity and performance | Excellent | Good | Poor | Good | Good | Excellent |
| Ease of maintenance | Excellent | Good | Poor (needs frequent vacuuming; stains easily | Good | Good (linoleum may need occasional waxing) | Good |
| Can radiate heat and store solar energy | Yes | No | No | No | No | Yes, depending on the material |
| Vulnerable to humidity and moisture damage | No | Yes | Yes | No | Yes | No |
| Can harbor mold, mildew, dust mites, and other allergens | No | Yes (mold and mildew, if the flooring becomes wet) | Yes | No | No | No |
| Is a sustainable flooring alternative | Yes | Maybe, if using wood sourced responsibly) | No | Yes | Maybe, if material is made from all natural materials | Yes |
| Average cost per square foot installed | $3-7 (for a 3,000-grit finish and the use of an impregnating sealer | $8-10 | $3.38-6.61* | $11-12* | $2.64-5.64* | $20-50+ |
| Average lifecycle cost | Extremely low | Intermediate | High | Low | Intermediate | Low |
**Citation: http://www.concretenetwork.com/concrete/polishing/comparison-chart.html
10 Steps for Polishing a Concrete Floor Using the Wet Polishing System
- Step 1: Grind using 30-grit diamonds
- Step 2: Grind using 50-grit diamonds
- Step 3: Hone using 100-grit diamonds
- Step 4: Hone using 200-grit diamonds
- Step 5: (Optional) Apply the Ameri-Polish dye color and then clean
- Step 6: Hone using 400 grit diamonds
- Step 7: Apply Ameri-Polish densifier/hardener
- Step 8: Polish using 800-grit diamonds
- Step 9: Polish using 1600-grit diamonds
- Step 10: Apply Ameri-Polish stain protector and then burnish in with 3000-grit diamonds
Benefits
- Hot new trend in interior designing.
- If polished to a high enough grit, it will have a high gloss and superior finish – it can look brighter than even marble or granite finishes!
- Level of sheen and gloss can be customized.
- Easy to maintain and clean – just dust or mop it and it’ll look like new!
- Cost effective
- Customizable – choose from endless designs and colors for your floors!
- Makes rooms look larger and brighter than they really are.
What Happens to My Concrete in “Concrete Polishing?”
- “Concrete polishing is actually “concrete processing” – the act of changing an existing concrete surface by means of a mechanical process that involves cutting and/or refining the surface to a desired finish. Polished concrete is one of many end results in what is the processing of the concrete surface by mechanical refinement through the use of multiple abrasives measured in grits.
- Currently, the industry breaks down the process of concrete polishing into grinding and polishing. Some within the industry simply use the word "polishing" for the entire process. The process of polishing concrete consists of three consecutive categories: grinding, honing and polishing. Each category is then broken down into multiple steps, consisting of consecutively finer grit abrasives. During this process a densifier or hardener is applied that is absorbed into the concrete creating a chemical reaction that makes the concrete more dense and hard.
- Not all processed concrete can be called polished concrete. For example, the grinding and honing category of steps results in a matte to a low, medium or high sheen appearance and does not go through the polishing category of steps.
- Citation: http://www.forconstructionpros.com/article/10303225/an-introduction-to-concrete-processing
What are the categories of “Concrete Processing?”
- Ground concrete is the lowest category of steps of a processed concrete surface. Any grit abrasive (if the abrasive medium is categorized in terms of grit) from approximately a 50-grit resin and below is considered a grinding step. A ground concrete surface has a flat appearance with no or very slight reflection and may at times have a low sheen.
- Honed concrete is the next category of steps above ground concrete in the processing system. Any grit abrasive from approximately a 100-grit resin to a 400-grit resin is considered a honing step. A honed concrete surface has a matte appearance and/or slight clarity of reflection that has a low, medium or high sheen.
- Polished concrete is the highest category of steps of processed concrete. Any grit abrasive from approximately an 800-grit resin and above, typically to a 1,500 or 3,000 grit, is considered a polishing step. A polished concrete surface has clarity of reflection like a mirror and has a glass-like finish.
- Citation: http://www.forconstructionpros.com/article/10303225/an-introduction-to-concrete-processing
Does All Concrete Polish the Same?
- One of the main variables on a polishing job is the concrete itself. Residential concrete is generally a low PSI concrete mix (2,500 psi and under) that has been hand troweled. Lower PSI concrete does not polish as well because the surface is not as dense and hand troweling leaves the surface with lots of highs and lows. On the other hand, commercial concrete is a higher PSI concrete mix (3,500 psi and up) that is machine troweled in the open areas and hand troweled in the corners and tight areas. Higher PSI concrete polishes better because it is denser and the surface does not have many highs and lows.
- If you know a slab will be polished before it is poured, whether in a residential or commercial setting, suggest a polishing-friendly mix design and floor flatness rating to the general contractor or owner. The customer will in turn get a better polishing result and possibly a lower cost to finish the floor.
- Citation: http://www.forconstructionpros.com/article/10303225/an-introduction-to-concrete-processing
Can All Concrete Be Polished?
- Almost any structurally sound concrete floor, whether new or old, can be polished. But there are some exceptions.
- For new floors, no special mix design is required to achieve good results. However, the floor should be in place at least 28 days before polishing begins to ensure adequate curing. If you plan to polish your floors after laying down new concrete, you may specify the installation of as smooth a floor as possible to minimize the polishing steps required and the associated costs.
- Existing floors typically require some surface preparation prior to polishing to remove dirt, grease, coatings, or blemishes. However, floors that are wavy, need extensive patching, or are extremely porous may not be good candidates for polishing. At Solid Rock Custom Construction, we can usually determine a floor's suitability.
- Citation: http://www.forconstructionpros.com/article/10303225/an-introduction-to-concrete-processing
Acid Stains
- Staining imparts a luxurious richness that can't be achieved by any other coloring medium. Rather than produce a solid, opaque effect like paint, stains permeate the concrete to infuse it with luminous, translucent tones that vary depending on the surface they are applied to and the application techniques used. The results can mimic everything from polished marble to tanned leather to natural stone or even stained wood.
Step 1: Dry grind the floor using 30-grit diamonds.
Step 2: Apply acid stain to floor and let sit for 8 hours.
Step 3: Neutralize and clean the floor.
Step 4: Let the floor dry and then apply a polyurethane top coat.
Stains for concrete come in two general categories: acid-based chemical stains and water-based acrylics. Most acid stains are a mixture of water, hydrochloric acid and acid-soluble metallic salts. They work by penetrating the surface and reacting chemically with the hydrated lime (calcium hydroxide) in the concrete. The acid in the stain lightly etches the surface, allowing the metallic salts to penetrate more easily. Once the stain reacts, it becomes a permanent part of the concrete and won't fade, chip off or peel away. The palette for acid-etch staining is generally limited to earthy tones, such as tans, browns, terra cottas and soft blue-greens.
If you want to go beyond the subtle drama and subdued earth-toned palette of acid staining, consider using water-based stains, which come in a much broader spectrum of hues. Most manufacturers offer dozens of standard colors, including black and white and even metallic tints. Like acid stains, water-based stains (typically a blend of acrylic polymers and pigments) penetrate the concrete to produce permanent color, ranging from translucent to opaque depending on the product.
Both types of stain can be applied to new or old and plain or integrally colored concrete. They are especially effective for revitalizing dull, lackluster surfaces. Because they penetrate the concrete surface, most stains have excellent UV stability and wear resistance, permitting their use on interior or exterior concrete. Applications range from walkways and patios to family room floors and kitchen countertops. They can also be applied to vertical surfaces such as walls or fireplace surrounds.
Like stains for wood, concrete stains are semi-transparent and are intended to enhance rather than disguise the surface. They will not hide cracks, blemishes or other flaws in existing concrete. Nor will they completely mask an underlying color or conceal the texture of the surface. An existing concrete slab with major cracks or spalling is usually not a good candidate for staining because any patchwork is likely to show right through the stain.
Because stains must be able to soak into the concrete to achieve full color saturation, they shouldn't be applied to surfaces covered by anything that can inhibit stain penetration, such as dirt, grease, glues, coatings, curing membranes and sealers.Citation: http://www.concretenetwork.com/stained-concrete/

Epoxy Coats
What is Epoxy Flooring - Resins and hardeners, when mixed together, turn into a thick plastic like substance called epoxy. This can be applied as a viable option to conventional flooring options like marble, wood or ceramic tiles. They’re extremely resistance to degradation and weather and ideal for use in commercial or industrial environments as flooring. You can either opt to apply a coating of epoxy or go for a complete epoxy flooring. Epoxy that is less than 2mm is said to be known as an epoxy coating. You can either utilize it for the latter or the former depending on the resistance required. For instance, self-dispersing epoxy floors are the most durable and used in places where surfaces have to be tough and need to withstand heavy traffic. On the other hand, graveled epoxy floors are used for decorative purposes such as in hospitals, hotel lobbies, etc. and have excellent anti-slip properties.7 Steps for a Decorative Epoxy Floor
- Step1: Dry grind the floor using 30-grit diamonds.
- Step 2: Repair any cracks or holes in the concrete.
- Step 3: Clean the floor.
- Step 4: Apply a base coat of 100% solids colored epoxy.
- Step 5: Apply decorative chips.
- Step6: Let dry.
- Step 7: Apply a clear coat of 100% solids epoxy.(For metallic decorative floors: Follow the same process as above except chips are not added and the top coat has a metallic color.)
Advantages
Epoxy flooring is Easy to Clean and Maintain: Epoxy floor coatings are easy to maintain. Other floors tend to hold dust because the surface keeps on eroding. But epoxy is sealed tightly leaving little chance for eroding. All you need to do is to use a dry mop and the floor is shining!No Fear of Mold and Mildew: Mold and mildew are a common problem in industrial floors and garages, especially when it’s real humid. Epoxy is resistant to mold, therefore health issues such as asthma or allergies can be kept at bay.
Versatile: You can come up with a wide variety of design ideas with epoxy flooring. These are especially useful for offices and industrial surfaces where a company logo and other patterns can be etched easily.
Easy to Apply: When applied for the first time, it can take time to install epoxy because the tiny bumps and holes have to be evened out. But once it is installed, coating it the second time is quick and effortless. All it takes is a single coat and the floor is ready for use.